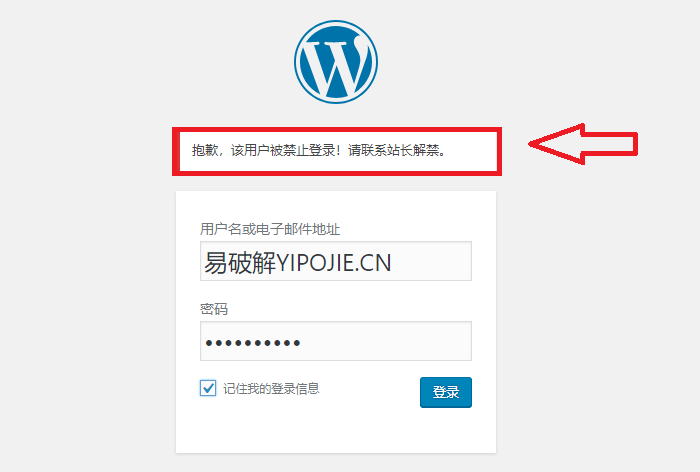
在某些特殊情况下某些用户损害了网站的利益,你可能就需要禁止他们登录网站,WordPress博客如何实现免插件纯代码添加禁止某些用户登录的方法,也就是WordPress博客用户怎么实现封号,此教程由亿破姐发布,近日以来亿破姐网站垃圾信息,垃圾回复泛滥,由于之前不怎么关注这块,但是现在不得不进行梳理一下拿出一个解决方案了,做网站的朋友都知道,自己辛辛苦苦写的文章,发的资源为了防止和谐只提供给网站注册会员使用,需要留言回复文章才可以获取下载地址,但是有一些伸手党随意的乱回复,乱灌水,简直就是一点对亿破姐起码尊重都没有,好吧为了此问题这下研究了下。

WordPress博客属于一个比较成熟的开源程序,安全性还是比较高的,官方也一直在更新维护,而且还是免费,WordPress博客的DIY可塑性很牛,由于WordPress博客默认很多功能是没有的,比如这个“WP禁止某些用户登录”都是需要自己DIY加进去的,当然了如果你觉得麻烦伸手党可以直接下载安装 Disable Users 或者 User Control 这2个插件的任意一个来实现。
下面亿破姐为大家谈一谈WordPress博客如何实现纯代码添加禁止某些用户登录的方法,由于插件太多会导致网站的效率降低,网站打开速度越来越卡,或者越来越慢,我们不需要利用插件只需要一串代码即可实现。
我们只需要在在当前使用的主题目录下的“ functions.php”中加入以下代码即可。
/**
* WordPress 禁止某些用户登录
* https://www.ypojie.com/5569.html
*/

// 禁止某些用户登录和访问后台
// 在个人资料页面添加选项,用于禁止某些用户登录
function wpse_add_user_ban_option( $user ) {
$current_user = wp_get_current_user();
$current_user_id = $current_user->ID;
// 用户不能禁止自己
if ( $current_user_id == $user->ID ) {
return;
}
// 只有管理员以上级别的用户才能禁止其他用户登录
if ( ! current_user_can( 'manage_options' ) ) {
return;
}
?>
<h3><?php esc_html_e( '用户登录设置', 'text-domain' ); ?></h3>
<table class="form-table">
<tr>
<th scope="row"><?php esc_html_e( '禁止登录', 'text-domain' ); ?></th>
<td><label><input name="ban_user" type="checkbox" id="ban_user"
<?php checked( get_user_meta( $user->ID, 'ban_user', true ), true ); ?>>
<?php esc_html_e( '选中禁止该用户登录', 'text-domain' ); ?></label></td>
</tr>
<?php wp_nonce_field( 'save_user_ban_option', 'user_ban_option_nonce' ); ?>
</table>
<?php
}
add_action( 'edit_user_profile', 'wpse_add_user_ban_option' );
add_action( 'show_user_profile', 'wpse_add_user_ban_option' );
// 保存用户禁止登录的选项
function wpse_save_user_ban_option( $user_id ) {
// 验证nonce和权限
if ( ! isset( $_POST['user_ban_option_nonce'] ) || ! wp_verify_nonce( $_POST['user_ban_option_nonce'], 'save_user_ban_option' ) ) {
return;
}
if ( ! current_user_can( 'manage_options' ) ) {
return;
}
// 用户不能禁止自己
if ( $user_id == get_current_user_id() ) {
return;
}
// 过滤和保存数据
$ban_user = isset( $_POST['ban_user'] ) ? (bool) $_POST['ban_user'] : false;
$ban_user = sanitize_text_field( $ban_user );
update_user_meta( $user_id, 'ban_user', $ban_user );
update_user_meta( $user_id, 'disable_password_reset', $ban_user );
}
add_action( 'personal_options_update', 'wpse_save_user_ban_option' );
add_action( 'edit_user_profile_update', 'wpse_save_user_ban_option' );
// 判断用户是否被禁止登录
function wpse_is_user_banned( $user ) {
return (bool) get_user_meta( $user->ID, 'ban_user', true );
}
// 阻止被禁止用户登录
function wpse_prevent_user_login( $user, $username, $password ) {
// 如果用户被禁止登录,则返回错误提示
if ( wpse_is_user_banned( $user ) ) {
return new WP_Error( 'login_failed', __( '抱歉,该用户违反相关规则,已被永久禁止登录!', 'text-domain' ) );
}
// 使用密码哈希验证
$hashed_password = wp_hash_password( $password );
$check_password = wp_check_password( $password, $hashed_password, $user->ID );
if ( $check_password ) {
return $user;
} else {
return new WP_Error( 'login_failed', __( '用户名或密码错误,请重试!', 'text-domain' ) );
}
}
add_filter( 'authenticate', 'wpse_prevent_user_login', 20, 3 );
下面的“如果用户被禁止,则禁止使用密码找回功能”代码需登陆可见内容
这段代码的作用是,如果用户被禁止登录,则禁止使用密码找回功能。具体来说,这段代码使用 add_filter() 函数将 wpse_disable_password_reset_for_banned_users() 函数加入到 allow_password_reset 过滤器中。该函数接受两个参数:$allow 和 $user_id。如果用户被禁止登录,则将 $allow 设置为 false,否则将 $allow 设置为 true。
需要注意的是,这段代码应该放在主题的 functions.php 文件中,或者放在一个插件中。
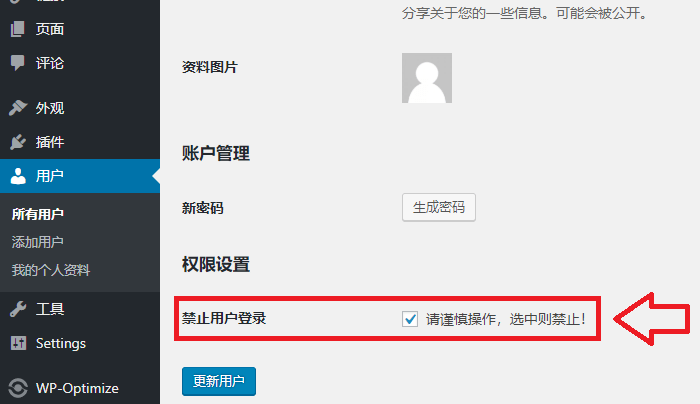
在我们的当前主题添加上面的代码后,我们即可在后台“编辑用户”的菜单里看到我们增加的“禁止用户登录”选项了;选中后,则会禁止该用户登录。

以上就是WP博客如何实现纯代码添加禁止某些用户登录的方法的全部教程,如果有更好的方法欢迎留言提出来,大家一起探讨交流。


